The DigiCommerce Subscriptions addon enables you to create recurring payment options for your products. This guide will walk you through the setup process and explain the various configuration options available.
How to Enable Subscriptions
Subscriptions allow you to offer recurring payment options for your products, creating a steady revenue stream. Here’s how to enable and configure subscriptions in your DigiCommerce store:
- Navigate to DigiCommerce Settings in your WordPress dashboard.
- Find the Subscriptions tab.
- Check the box labeled Enable subscriptions for your products.
- Save your changes.
Once enabled, you’ll be able to set up subscription options for individual products in your store.
Email Reminder Settings
Email reminders are an important part of subscription management, helping you communicate with customers before their subscription renews. To configure email reminders:
- In the Email Settings section, check the box for Enable subscription renewal reminders.
- For each reminder email, you can configure:
- Days Before: How many days before renewal to send the reminder
- Send To: Choose between “All subscribers” or “Only cancelled subscriptions”
- Email Title: The subject line of the email
- Content Title: The main heading within the email body
- Email Text: The message content, with support for variables like {first_name}, {last_name}, {days_remaining}, {renewal_date}, and {renewal_amount}
- To add additional reminders, click the Add Email Reminder button.
- Reminders can be rearranged by dragging and dropping them into your preferred order.
CRON Settings
The CRON settings control how often DigiCommerce checks for and processes subscription renewal reminders:
- Set your preferred CRON Schedule Interval by entering a number and selecting a unit (Seconds, Minutes, Hours, or Days).
- This determines how frequently the system will check for subscriptions that need renewal reminders sent.
For most stores, checking every 12 hours (default) is sufficient. However, you may want to adjust this based on your store’s volume and customer needs.
Setting Up Subscription Products
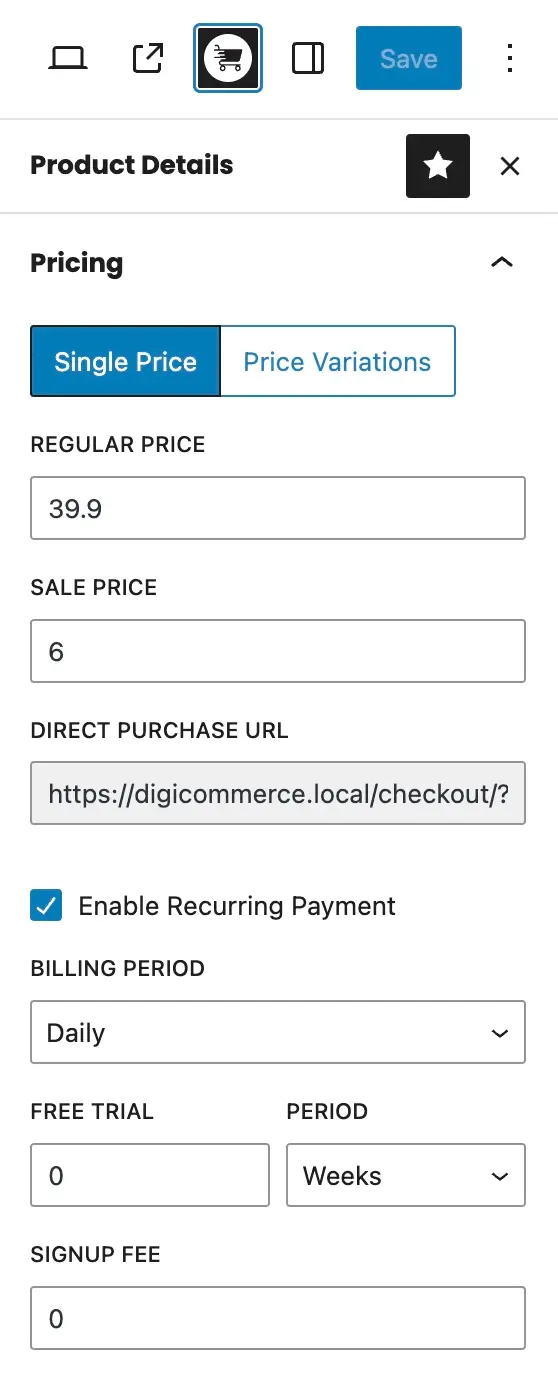
After enabling subscriptions, you’ll need to configure individual products to be sold as subscriptions:
- Edit a product in the WordPress editor.
- In the product sidebar, check the Enable Recurring Payment option.
- Configure the following options:
- Billing Period: Choose daily, weekly, monthly, or yearly billing cycles
- Free Trial Duration (optional): Offer a free trial period
- Signup Fee (optional): Charge a one-time fee when customers first subscribe
Managing Subscriptions
Once customers start subscribing to your products, you can manage their subscriptions from the DigiCommerce dashboard:
- Go to DigiCommerce > Subscriptions to view all active subscriptions.
- From this screen, you can:
- View subscription details
- Change subscription status (active, paused, cancelled)
- Add notes to subscription records
- Filter subscriptions by status
Your customers can also manage their own subscriptions through their account dashboard, where they can view, pause, or cancel their subscriptions.
Subscription Status Types
DigiCommerce supports several subscription statuses:
- Active: Subscription is currently active and will renew automatically
- Paused: Subscription is temporarily on hold but can be resumed
- Cancelled: Subscription has been cancelled and will not renew
- Expired: Subscription has reached its end date and is no longer active
Status changes can be made by both administrators and customers, depending on your configuration.